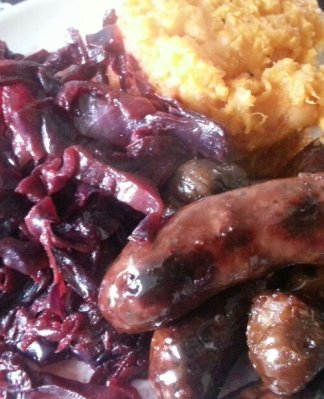
Beetroot Risotto

I had quite a lot of raw beets in my fridge since Tuesday, and after lots of deliberation I opted to go the risotto route.
You can use raw or cooked beets. If you are using cooked make sure you use ones that aren’t pickled or in any form of juice. If you can use raw then please do. they are so tasty and all those nutrients will get sucked up by the rice. After all isn’t the the beetroot of of these new “superfoods”

Ingredient

550g raw beetroot (once peeled about 460g)
5g butter
3 shallots (or medium onion)
2 garlic cloves
small glass white wine (optional)
1ltr Veg Stock
50g grated mozzarella
couple of handfuls of spinach
Thyme

1. Finely dice the shallots/onion and garlic.

2. Now dice the beetroot into small cubes. If you are using raw beetroot, you will need to peel them first. Some might wear gloves to do this as they don’t want stained fingers. However, if you are like me and you are never that organised to have gloves in the kitchen to use for this sort of thing you need to be a bit more careful. SO, if you hold the beetroot by the root you can peel them quiet easily with a peeler and get very little juice on your fingers. Then still holding the root you can slice the beetroot into rings and then slice into small cubes.

3. Heat a large non stick frying pan and add the butter, onions and garlic. Cook until the onions start to go clear.

4. Add the rice and stir in to the onions, after a few minutes it too will start to go a little opaque. add the white wine if you are using it, if not add a ladle of the stock. Cook for a couple of minutes.
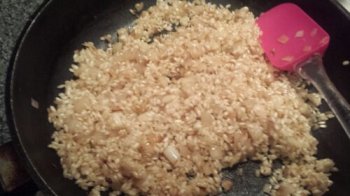
image5. Add the beetroot. You will see that straight away the beetroot juice will bleed into the rice as you stir it in. Also add the thyme leaves.image 6. Pour in a some of the stock, just enough to cover the rice. Stir and let it simmer until the stock is absorbed into the rice, then gradually add more stock.
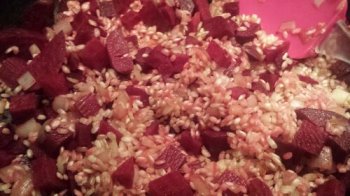
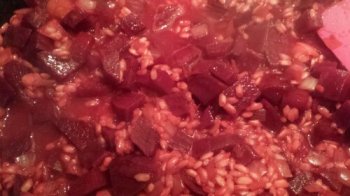
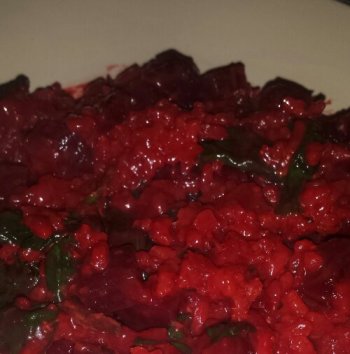
imageKeep doing this until the rice is cooked. As it cooks you will see the rice take on a deeper red colour. It is so pretty, pity it hasn’t come out very well on my phone camera, so you will have to cook it yourself to experience the lovely colour for yourself. Don’t let it dry out, it is meant to be a little “sloppy”, but be careful you don’t give it too much stock and it becomes a soup!

You want the rice to retain its shape and texture, not to just be sloppy and over cooked so make sure you keep an eye on it. Depending on how small you have diced the beetroot it will either be soft or still have a little bit of crunch. Either way it is lush!

7. This time I have used some cheese. Mozzarella has about 100cals less than Parmesan per 100g. Adding 50g to the risotto adds about 31 calories per person. I will go all stringy as you stir it in but will soon melt into the risotto. Add the spinach stir in and let the heat wilt it.
image

So, there you have it, a lovely ruby red, tasty filling risotto. Serving it up to 4 people gives you 346 calories per portion. It is less than 5% fat.

Enjoy and let me know what you think.

Squash and Green Lentil Soup

I know I have done a squash soup before but this one is different. Just as yummy and perfect for those cold winter evenings. Supper healthy and ubber low in fat and calories. The the fennel seeds add a subtle aniseed twist which compliments the taste of the squash. It’s not a delicate soup but a thick homely bowl of goodness.

Ingredients
1 onion
2 cloves garlic
2 dried chillies
1 tbls ground fennel seeds
1 medium squash
180g green lentils
Oil spray

1. Finely chop the dried chillies, onion and garlic. I use whole fennel seeds and grind them in my pestle as I love the aniseed smell that you get. But the ready ground stuff is ok.

2. Spray a large pan with oil add the garlic, chillies, onions and fennel seeds. Cook them off.

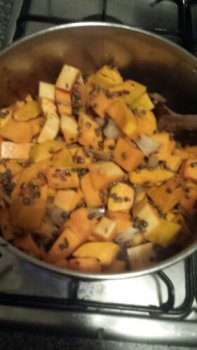
3. Peel and deseed the squash. You can use any squash and on this occasion I used a very small butternut squash and a small green kabacha squash that I had in my fridge and needed using. Once peeled cut it into small chunks.

4. Add the squash and lentils to the pan. Stir in and heat through. For a minute or two.
image

5. Pour water over until it just covers the squash and lentils. Simmer on a medium heat for about 40 minutes until the squash and lentils are soft and cooked.

6. Take a potato masher and gently mash the squash so it breaks down a little.

7. Season with some salt and pepper to taste and serve.
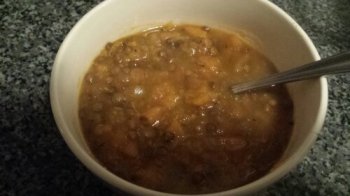
image

Enjoy! It’s thick, hot, very filling and very tasty.
It makes about 6 servings, depending on the size of squash you use. It works out at around 100 calories for a decent serving.

As before, give it a go and let me know what you think.
Pumpkin, Spinach and Chestnut Risotto

Soooo not done a recipe in ages. This is one of my favourite meals. It is dead easy to make but tastes delicious! You can use any kind of pumpkin/squash. I would normally use butternut squash but I had a small pumpkin sitting in my fridge needing to be used so that was used this time.
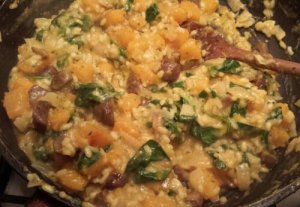
As you will see from the pics this isn’t a nice delicate risotto that you get in a resturant, its one full of flavour and lots of veg! You could use more rice and make it stretch further if you like.

There is loads of goodness in this, lots of vitamins in the squash, lots of iron in the spinach and those chestnuts (the lowest calorie nut) are a good source of fibre.
wpid-20131118_181850-1.jpg

Ingredients:
500g squash/pumpkin
1 medium onion
140g arborio rice
2 handfuls fresh spinach
5g butter
1l Vegetable Stock (you might not need it all)
200g whole cooked peeled chestnuts (I use the Merchant Gourmet Whole Chestnuts in the packet)
Some chopped parsley
100g Pancetta cubes (optional) (the ones you buy in a double packet in Sainburys or Tescos or all supermarkets!)

1. Finely dice the onion. Peel, de-seed and cut the pumpkin into small chunks (1cm or less.. don’t forget it needs to cook in the time it takes to cook the rice). Roughly chop up the chestnuts into large chunks.

2. Quickly fry off the pancetta until crispy and a lot of the fat has cooked out of it. . Remove from the pan and drain on kitchen towel to get rid of as much fat as possible. Put in a bowl and leave to one side.

3. In a clean non-stick pan melt the butter and lightly cook off the onion until it goes clear. Use butter, a little tiny amount like this is not going to be a major thing and it tastes so much better than that horrible processed chemical rubbish that is margarine or low fat spread.

4. Add the rice and stir in to the onions, after a few minutes it too will start to go a little opaque. Add the cubbed pumpkin, stir in and let it cook for a couple of minutes.

5. Now comes the boring part. Pour in a some of the stock.. just enough to cover the rice. Stir and let it simmer until the stock is absorbed into the rice, then gradually add more stock. Keep doing this until the rice is cooked. It won’t be dry, it is meant to be a little “sloppy”, but be careful you don’t give it too much stock and it becomes a soup! You want the rice to retain its shape and texture, not to just be sloppy and over cooked.

6. Before you add the last bit of stock, throw in the chestnuts and the chopped parsley (I use the frozen stuff. Its already chopped and is a bit fresher and nicer flavour than the dried stuff). Stir, when you are happy the rice and pumpkin is cooked remove from the heat.

7. Add the spinach stir in and let the heat wilt it.

8. Dish up, scatter the crunchy pancetta over the top and serve.
image If you have cooked or eaten risotto before you will have realised I have missed the cheese, Italian or other. This was intentional. The main reason being I am on a diet. Parmesan cheese and other hard cheeses are rather high in fat content. I guess If you really felt the need for it you could grate in some low fat cheese, if you are watching your weight, or some lovely full fat Parmigiano Reggiano if you’re not!

By scattering the pancetta over the top you get that little salty taste that you would have got from the cheese. To be honest it is not imperative that you have it but, the pancetta just adds a little crunchy texture to the softness of the rest of the dish.

So according to myfitnesspal.com there is 377 calories in a serving. I would say there was a little less as you got rid off a lot of the fat from the pancetta at the beginning. It is also less than 5% fat (only fat in it comes from the small amount of butter and the pancetta you used.

Anyway give it a go and as I have said before let me know what you think!

Buon appetito!!

Garlic and Lemon Squid

Been a while hasn’t it. Well here is a quickie. This is a light and tasty meal.
(Don’t be afraid of cooking squid. It is one of those that need a quick hot cook. If you cook it too long it will become rubbery.)

It’s not too expensive either. Get the smaller ones as they are sweeter and less rubbery.

Ingredients:

270g squid
1 lemon
10g butter
2 garlic cloves
Parsley (I used the frozen prepared parsley from sainsburys, its handy to have in the freezer)
Salt and pepper

1. You need to prepare the squid. It is really easy, but if you dont feel you can do it then get the fishmonger to.

You just pull the head away from the body. Stick your finger inside and remove the  quill from inside the body part, (its like a long clear shard of glass). Remove the ‘ears’ from either side of the squid body and remove the skin with your fingers. Cut the tentacles just below the eyes, (don’t whatever you do cut the ink sac). Pull away the ‘beak’ at the base of the tentacles. Now just wash it and then dry on some paper towel. Then just slice the body of the squid into rings.

2. Put a large nonstick frying pan on the hob. Add the butter, zest of the lemon and finely chopped garlic. Heat the pan and stir.

3. When the butter is melted and the pan really hot throw in the squid (rings and tentacles). It will take literally 2 mins to cook, and stir it until its ready. Season and add the chopped parsley. Turn off the heat, and squeeze half the lemon over the squid.

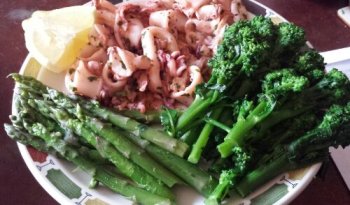
That’s it, a whole meal (squid and veg) cooked in 5 minutes This will quite easily do 2 people. Or if like me you have calories to eat its is great for 1.
image
This whole plate with 100g broccoli and 120g of asparagus is only 433 calories (according to myfitnesspal) and its less than 5% fat.
The squid dish (minus the veg) is 336 cals. Or if you split it into two only 168 calories.

Enjoy!!

Butternut Squash Curry

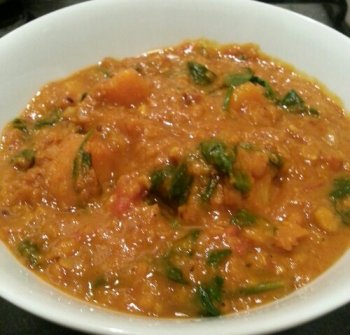
So another recipe as part of my eating for £2 a day. You must have guessed I like my curries and yes its another one. But this time its a veggie one. Its ultra yummy and so low in fat and calories you can eat loads of it without feeling guilty. It is quite a mild curry but can be hotter if you add the seeds from the chilli

Ingredients

Spray oil
1 onions,
3 garlic cloves
2cm slice/knob fresh ginger
1 small red chilli
2 tsp ground coriander
2 tsp ground tumeric
2 tsp ground cumin
2 tsp garam masala
1 butternut squash
100g red lentils
750ml vegetable stock
400g tinned choppes tomatoes
200g spinach
200ml light coconut milk

1. Peel, deseed and cube the butternut squash. Finely chop the garlic and ginger. Dice the onion. Remove the seeds from the chilli and thinly slice.

2. Heat a large pot and spray about 4 sprays of oil. Add the onions and sweat them off for 5 or 10 minutes until turning golden.

3. Add the garlic, ginger and red chilli, and cook, for about five minutes. Keep the ingredients moving in the pot.

4. Add the spices and cook them out, add the butternut squash and lentils, and stir.

5. Add the stock and tomatoes.
Simmer until the squash and lentils are cooked and tender, stiring occasionally. This will take about 30 mins.

6. Stir in the coconut milk and cook for another couple of minutes. Remove from the heat and add the spinach, stir it in, the heat from the curry will wilt the spinach.

Serve up and enjoy!!
image

This is so tasty and does a lot of curry. Easily doing 6 servings. At 6 servings you are only looking at about 130 calories (according to myfitnesspal), so leaves plenty of room for rice, nann pudding whatever!!!

Give it a go and let me know what you think.
Roasted Chickpeas

So on a budget I need something to snack on. In the past when the boy was little I made all sorts of different types of snacks that went in his pack lunches. Crisps, roasted chickpeas, various types of popcorn. I brought dried chickpeas yesterday so after leaving them to soak over night, then boiling them for an hour to cook I have decided to roast them. I’m doing some with a sweet flavouring and some with savoury. Really you can use any flavours you fancy.

Obviously to save time use tinned beans.. I have discovered about 130g dried chickpeas once soaked makes up about the number in a tin.

Rosemary and Salt Roasted Chickpeas

1 tin chickpeas
2 sprigs rosemary chopped
Spray oil
Salt

Preheat the oven to 230 degrees

1. Drain the chickpeas and make sure they are really dry.  Put them in a bowl add the rosemary and about 4 grinds of grinds of salt from your mill. Squirt 4 squirts of oil in and mix up so the chickpeas are coated.

2. Tip them out onto a linned tray and cook in the oven for 20 or 30 mins. Make sure you check them reguarly and move them about so they don’t burn. Your kitchen will soon be full of the smell of rosrmary.

3. Take them out and let them cool.

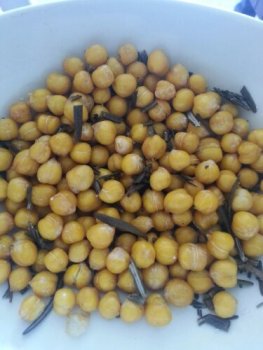
image

Honey Roasted Chickpeas

1 tin of chickpeas
2 tbsp runny honey
1 tsp brown sugar
Salt
Spray oil

1. As above drain and dry the chickpeas. Put them in a bowl with the honey, sugar, couple of grinds of salt and 4 squirts of the oil. Mix them all up and make sure they are all coated.

2. Tip them out onto a lined baking tray. Again roast them for 20 or 30 minutes.  Keep an extra eye on these because you are using honey and sugar and they will burn and go black within a blink of the eye.

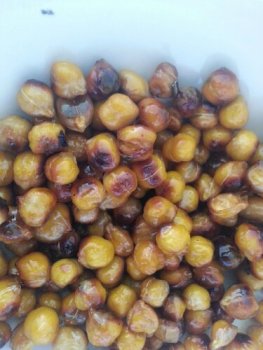
3. When they have gone golden, they will be darker than the rosemary ones, take them put and leave to cool.

image

These are cheap and an easy way for me to keep my calorie intake up. 290 ish calories in a tin of chickpeas. And its all natural, no additives.

You can mix them in with some almonds and rasins/sultanas for an extra treat.

Give them a go and let me know what you think.
5 Spice Pheasant

I love pheasant. My father goes beating during the shooting season and I am often lucky enough to be given some pheasant to go in my freezer.

As I am stoney broke it time to use the last of my pheasant.

This is very yum and slightly different to most pheasant recipes you will come across. The marinade is there really just to give a back ground taste. You don’t want to over power the flavour of the pheasant but to enhance it otherwise you might as well just eat chicken.

Ingredients

1tsp soy sauce
2tsp chinese 5 spice
2 tbsp runny honey
1garlic clove finely chopped
1cm chunk of finely chopped ginger

400g pheasant breasts
2 tsp cornflower
2 handfuls of spinach (about 100g)

1. Mix all the soy sauce, ginger, garlic, 5 spice and honey together in a bowl.

2. Skin and thinly slice the pheasant and added to the marinade. Rub the marinade into the pheasant cover the bowl with clingfilm and leave to marinade in the fridge for at least 2 hours or longer.

(Pheasant breast has a habbit of drying out very easily when you cook it. It doesn’t have much fat and as we have removed the skin it has even less. So we are going to cook it on a high heat quickly to seal the meat and its juices in.)

3. When you are ready to cook sprinkle the cornflower over the meat. This will stop it from sticking. Heat a wok or large nonstick pan. Make sure it is really hot. Spray a couple of shots of oil in and bung in the pheasant. Let it settle in the wok for a minute or two just to seal on one side. Then stir fry the pheasant. This will take a matter of minutes.

4. Throw in the spinach stir it in and remove from the heat to let the pheasant rest before you serve it up. The residual heat from the pheasant will wilt the spinach.

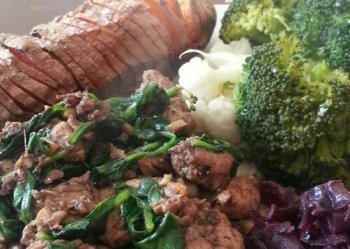
Serve it up with some noodles or rice or as I have with some sweet potato, braised red cabbage and veggies.
(The red cabbage I found in my freezer having frozen small portions off it back when I last made it).
image

So now the calories. Into 4 there are 227 calories (according to myfitnesspal).

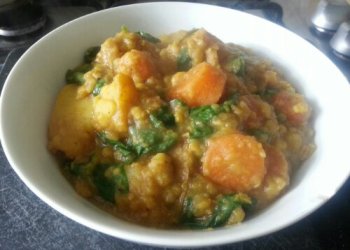
Spicy Root Veg, Spinach and Lentil Stew

So here is number 1 of my thrifty recipes.

A spicy root veggie stew. I don’t peel the root vegtables so I keep all their vitamins and nutrients.
It’s easy to make and cheap too. This does about 4 servings. So thats 4 dinners or some can be half portions for my lunches.

Ingredients:

Spray oil
1 onions
3 garlic cloves
750g potatoes
2 parsnips
4 carrots
2 tbsp curry powder
1litre stock
120g red lentils
20g pearl barley
150g Spinach
Salt and Pepper

1. Heat a large casserole pan, spray a couple squirts of the oil and cook the chopped onion and finely chopped garlic until softened, stirring occasionally.

2. Chop the potatoes, carrots and parsnips into quite large chunks and cook for 6-7 minutes, stirring, until the vegetables start to colour.

3. Stir in the curry powder and stock and bring to the boil. Reduce the heat, add the lentils and pearl barley, cover and simmer for 20-30 minutes until the pulses and vegetables are tender and the sauce has thickened.

4. Mix in the spinach season and cook for another 4 minutes.
image
Serve up and enjoy!

According to myfitnesspal.com this is 365 calories per serving. Its lovely and filling and low in fat. Now that can’t be bad can it?

I would normally serve it up with some nann breads, pitta bread or wraps.
(Obviously thats not an option for me at the mo).

Swordfish With Mango Salsa

Yum.. that is all I can really say about this one. Perfect light, low fat low calorie scrummy meal for a warm spring/summers day.

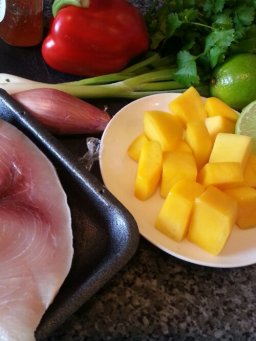
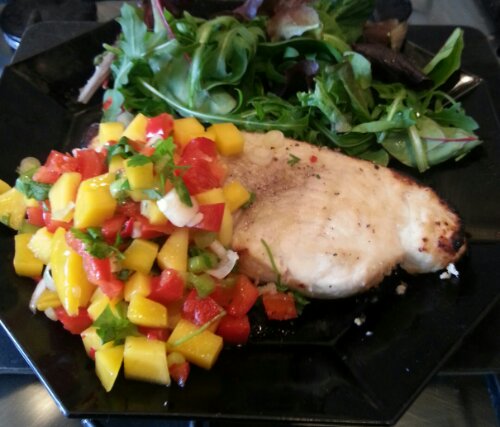
The swordfish is grilled after marinating and served up with a refreshing spicy mango salsa and a leafy salad. You can if the weather is nice enough BBQ the swordfish.

It can be a little pricey,  but it is so worth it, I normaly get it when its been yellow labeled/reduced. It is meaty, firm and quite mild in flavour. You can do this with a nice thick tuna steak too.

You can prepare and cook this entire meal in under 20 minutes.

image

Ingredients:
200 g mango
1 red chilli
1/2 red pepper
Handful corriander leaves
2 spring onions
1 and 1/2 limes
2 swordfish steaks
1tsp Honey
1 shallot
Salt and pepper

Salsa

1. Finely chop the spring onions and red pepper, deseed the chilli and finely chop, chop the corriander leaves. Put them into a bowl.

2. Now I could say I brought a mango and removed it from the stone and peeled it myself, but why bother when I can buy ready prepared mango in the chiller at the supermarket. So it’s up to you? Be a martyr or a cheat. I’m a cheat. Slice the mango into small cubes. Mix into the other salsa ingredients with the juice of 1/2 a lime.

3. Put into the fridge to chill.

Swordfish

1. Blitz the honey, juice of 1 lime, chopped shallot together. Brush all over the swordfish steaks. Leave to marinade for 10 mins. While it is I tend to make the salsa. Preheat the grill.

2. Season the swordfish with the salt and pepper and place under the grill.  Its important you don’t over or undercook the steak. As long as your grill is hot it will literally only need 3 or 4 minutes on each side depending on the thickness.

3. Normally half way through cooking on each side I tend to brush a little more of the marinade over it. It is cooked when the flesh is white and flakes.

I like to serve it up just with a leafy salad as that’s all it needs.

That’s it, easy.
image

If your steaks are about 200g each then the total calories including salad according to myfitnesspal is about 315 calories.

Give it a go and let me know what you think. I don’t think you will be disappointed.
Glazed Venison Sausages and Braised Red Cabbage.

How lucky are you?! Two recipes for the price of one!! And both really easy to make.

Venison is a lovely meat, lean and very tasty. Unfortunately it can be rather pricey so definitely not one of my normal meals, not even in sausage form however I found some sausages in the supermarket that had been reduced at the weekend so I had to take advantage. As they are venison sausages and a little special I like to do something a little more than the normal bangers and mash.

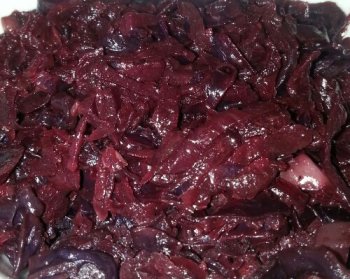
The braised cabbage recipe below is one I made up using my two favorite veggies, red cabbage and beetroot. Most recipes you will find put apples in, but I find the sweet beetroot adds a lovely depth of flavour and colour.

If you don’t use it all you can keep it in the fridge or freezer and re-heat when you need it. You could also eat this as a meal by itself. (Who says I don’t cater for veggies?!?!) But it is a perfect accompaniment for the glazed venison sausages below.

Braised Cabbage

Ingredients:

1 small red cabbage (approx 450g)
1 red onion
2 raw beetroot
60g muscovado sugar
3 tsp red wine vinegar
1/2 tsp ground cinnamon
Salt and pepper to season
20g butter (optional)

Serves 6

Preheat oven to 170°

1. Finely slice the onion, peel and grate the beetroot,  slice the red cabbage removing the stalk.

2. Put it all into a large casserole dish and mix up.

3. Add the vinegar,  ground cinnamon, sugar and season with salt and pepper.  Stir in.

4. Dot butter over the top, put a tightly fitting lid on and put in the oven. If your lid is a bit loose, put foil over the top before putting the lid on. Cook for and hour and 1/4. Stir it a couple of times during that time, making sure you put the lid back on snuggly each time.

image

If you split it into 6 portions you are looking at 125 calories a portion (according to myfitnesspal). If you split it into 4  you are still only looking at 187 calories. Cheap, simple and oober tasty.

Glazed Venision Sausages

Ingredients:

6 venison sausages
100g chestnuts
3 tbsp maple syrup

Serves 3

1. Cook your sausages however you like to. I put them in the oven for the last 1/2 hour of the cooking time of the cabbage.

2. When cooked put them in a hot dry pan, add the chestnuts and the maple syrup. Cook until the sausages and chestnuts have a lovely sticky glaze.

Easy as that! Split into 3 portions its 200 calories each, into 2 portions 300 calories.

image

I serve the sausages and cabbage with some mashed sweet potato.

Told you they were both easy recipes. They are low in fat and so tasty.

So give both or either recipes a go and let me know what you think.